Sunday, December 28, 2014

Making a Come Back

I am determined to make a come back. I mean it this time. I really do. This last week, I ran a grand total of 5 miles and it took everything I had. You may be saying, "What? But you just ran a freaking MARATHON the end of September!" I tell myself the same thing, but then I have to remind myself of the following: got mono, ran a freaking marathon with mono in the rain and cold, got a sinus infection, fought a cold, got another sinus infection, migraines came back, and got stitches in my finger. I'm typing this right now with the last one. If I can't get a break soon, I'm MOVING into a bubble.

Overall though, I'm feeling so much better. This means that I'm beginning to cook again! Oh Happy Day! Tonight, I invited some friends over for dinner. I decided to make my FIRST EVER POT ROAST. It turned out amazing. I wish I took a picture of it. I totally forgot before it was all gone.

This is how I did it:
Put a chuck roast in a crock pot
Add cut up potatoes, onions, carrots, and celery   (I used baby carrots, so I didn't cut them up)
I mixed 1 cup water with a pot roast mix I purchased at the store, pour it over the pot roast
cook on low heat for 8 hours

Enjoy!

I needed a yummy dessert to go with the delicious pot roast. I had 2 cans of apple pie filling in the cupboard, so I thought....hmm. An idea hit me.

APPLE DUMP CAKE

You will need:
2 cans apple pie filling
1 cake mix (I used white, but yellow works too)
1 stick butter
cinnamon
nutmeg
pecans (or walnuts)

Spray a pan of your choice, I used a bundt pan.  Pour the apple pie filling in the bottom of the pan. Sprinkle with cinnamon. Pour the cake mix over pie filling evenly. Cut up butter to place evenly over cake mix. Sprinkle on as many pecans as you would like. Sprinkle on some more cinnamon and add on a little nutmeg. Bake at 350 for 45-55 minutes. You want the top to be light brown. Let cool some before eating.


Just so you know, this meal got mega good reviews from those who ate it! You should try it. Just say''n.

Doesn't it look super duper easy?


Saturday, November 15, 2014

First Arm Knitting Experience

I've been kind of bored lately. Mostly because I've been too lazy to workout in any form. The only exercise I am a participating in is lifting my arm to my mouth. Pathetic, I know. It doesn't help that I'm a total stress eater and I'm stress out of my mind. I was determined to do something other than watch Netflix.

I decided to try my hand at knitting...again. I once knitted a scarf. I have a good friend who is an amazing knitter and she was willing to teach me. My first project is a hat. I'm using a circular needle. The hat is looking good so far. I think I got the knit and purl down. I even added two decorative rows to make it look neat. I had to stop because I haven't learned how to start tapering off.

As I'm waiting for my next knitting lesson, I did some research on arm knitting. Haven't heard of it? Arm knitting uses your arms as the needles. It makes the knit very loose.

I purchased some yarn and started. It took me about 25 minutes to knit an infinity scarf. It didn't work out at all. When I was all finished knitting, I didn't end it correctly. I'm not sure what I did wrong, but it all unraveled into one messy heap. I gave up for the night.

Yesterday, it took my 2 hours to unravel the heap of yarn. Thank goodness for TV.

I started the whole process again today. This time it worked out wonderful. And it was easier the second time around. See for yourself.

This is the site that I used:
Want to learn to arm knit? Click here!


My unfinished hat

Saturday, November 1, 2014

Pumpkin Waffles

Halloween was yesterday. I did my darnedest to limit my candy consumption. I did a pretty good job...I hope the scale will reflect it.

It was difficult to get up this morning, but I did it. It helped that I had a trail run scheduled with a friend. We tackled Wadsworth Creek. There were still fall colors on the trees. Truly beautiful.

After running, all I wanted to eat was pumpkin waffles. I've never had them before, but I had exactly 1 cup of pumpkin left from the pumpkin pie fudge and pumpkin chocolate chip cookies this week. And I found a recipe that sounded delightful.

I made them for dinner. So freaking delicious.


Pumpkin Waffles
makes 4 round waffles

Waffles:
1/4 c. brown sugar
3 tbs cornstarch
1 1/4 c. flour
1 1/2 tsp baking powder
1/2 tsp salt
1 3/4 tsp cinnamon
2 tsp ginger
1/4 tsp cloves
1/4 tsp nutmeg
2 large eggs
1 c. milk
1 c. pumpkin
4 tbs unsalted butter, melted and warm


Toppings:
whipped cream
pecans
maple syrup


Instructions
1- Spray the waffle iron and let it heat up
2- Combine the brown sugar and cornstarch in a large bowl. Mix together and add the rest of the dry ingredients. Mix.
3- Separate eggs: place yolks in a medium bowl and egg whites in a small bowl.
4- Add pumpkin and milk to the yolk. Whisk and set aside.
5- Using a hand mixer, whisk the egg white until they form stiff peaks. (about 2 minutes).
6- Whisk the butter into the pumpkin milk mixture.
7- Add the pumpkin milk mixture to the dry ingredients. Stir. It will be slightly lumpy.
8- Add egg whites and fold them in until you can no longer see white.
9- Pour batter into the waffle iron and cook until done.
10- Top your waffle with whatever toppings you like and prepare yourself for the BEST pumpkin waffle ever.


Recipe adapted from http://pumpkinwaffles.wordpress.com/ultimate-pumpkin-waffle-recipe/


Thursday, October 30, 2014

Burning Pumpkins and Pumpkin Pie Fudge

I LOVE fall!!! Don't you? The colors, the smell of the air, and of course lots of pumpkin goodies.

One year, a friend and I decided to puree our own pumpkins. It took forever and we didn't end up with as much pumpkin puree as we thought. Oh, we also discovered that when using a steamer, the pumpkin strings can work their way to the bottom where the water is at. When this happens and the water is all dried up, it doesn't smell good. I burnt the inside black. Luckily for me, my mom is a genius and knew that soaking the pan in vinegar would do the trick and get rid of all the black burnt pumpkin.

I learned my lesson that day. BUY PUMPKIN PUREE in the can. It saves a whole heck of time and energy, Plus, it's pretty cheap.

Last year, a co-worker gave me some of the BEST fudge that I have EVER had.  Of course, I acquired the recipe. I'm now sharing the recipe with you. If you LOVE pumpkin, you will absolutely LOVE this fudge. Go ahead and make it. I dare you.

PUMPKIN PIE FUDGE
1 1/2 c. sugar
1 1/2 c. brown sugar
2/3 c. evaporated milk
3/4 c. unsalted butter
1 c. canned pure pumpkin
2 tbs. corn syrup
 3 tsp. pumpkin pie spice
9 oz white chocolate chips
7 oz marshmallow fluff
1 tsp. vanilla

Instructions:
1) In a large saucepan over medium-high heat, combine the sugar, butter, milk, pumpkin, corn syrup, and pumpkin pie spice. Stir constantly until the mixture comes to a boil. Continue cooking and stirring until a thermometer reads 235 degrees F (soft-ball stage). DON'T GUESS ON THIS PART, YOU SHOULD DEFINITELY USE A CANDY THERMOMETER!

2) Remove the pan from heat and add the white chocolate chips, marshmallow fluff and vanilla. Let it sit for about a minutes and soften. Then stir until it is all melted and blended. Pour the mixture into a 9x9 pan lined with parchment paper. Let stand until completely cool and set. Cut the fudge into 1-inch squares.

Like I said, you gotta try this fudge! When you do, let me know what you think.

Sunday, September 28, 2014

26.2 or Bust

After 9 months of training, I finally did it. I ran my first marathon. I had no idea of what to expect. The internet had lots of "what to expect" and gave me a little insight. This race went nothing like I imagined it would.

The last month, I went back and forth on whether or not I would actually be able to run. I was told I had mono the beginning of September. At the same time, I came down with a bad cold virus. My bed became my best friend. I slept as much as I could and eventually began to feel better. Then last Saturday I had to go into insta care.  I had come down with a sinus infection and the start of an ear infection.  

With all of this, I decided I still wanted to run and I felt well enough to run.

Here is the run down of my BIG race day:
Got up at 3:30 am
Sat on the bus to avoid the rain till race time
Ran a lot 
RAIN
COLD
Bitten by millions of MOSQUITOES
More running, rain, and mosquitoes
Felt like death, but kept running
Teamed up with other runner to run/walk last 4 miles...in the rain
Finished in 5:48 

Honestly, it was the worst running experience of my life. 

Am I glad I stuck it out? Yes.

Did I meet my goal? Yes. It was just to finish.


Will I run another marathon? Yes, just never again in the rain and cold. 


Sunday, September 7, 2014

Peach Pie and Training

Last Monday, I completed my 20 mile run! Holy crap, the last mile was tough, but I did it. It's a little scary to think that I will be running 26.2 miles on September 27th...hopefully.

Why hopefully you ask? Well, I've been super tired lately and finally went to the doctor about it. The blood tests came back positive for mono. I thought mono was the kissing disease that teenagers and young adults get. I wish I got it from kissing some hot man, but that is sadly not the case. I have no freaking idea where I got it. I am still determined to run on the 27th. I think it will be possible with a lot of rest the next couple of weeks.

Today, after sleeping most of the day I had enough energy to bake a peach pie. I'm so glad I did because it was delicious. It also made a great dinner.


I found the peach pie recipe while searching on Pinterest. I LOVE Pinterest!!! I find all sorts of fun recipes to try. I adapted the peach pie filling from www.grandbaby-cakes.com. It was just what I was looking for. 

Every pie needs a great crust. I was lucky enough to find one a few months ago on The Pioneer Woman website. Did I mention how much I love this crust? 

Let's start with the crust.

 Here's what you need:

  • 1-½ cup Crisco (vegetable Shortening)
  • 3 cups All-purpose Flour
  • 1 whole Egg
  • 5 Tablespoons Cold Water
  • 1 Tablespoon White Vinegar
  • 1 teaspoon Salt

In a large bowl, add flour and shortening. Use a pastry cutter to cut in the shortening until it looks like coarse meal. In a small bowl, beat the egg. Add egg to the flour mixture. Add water, vinegar, and salt. Mix together gently until ingredients are all mixed together. 

Separate the dough into two parts. Place each part on plastic wrap and gently flatten. Finish wrapping it up and place in the freezer for 15 to 20 minutes. You'll be thankful you did.

When you are ready, roll out one part of the crust on a floured space. Make sure you roll it out to fit your pie plate with an half an inch to spare. Fold in half and lift into pie plate.


Now the filling:

What you'll need:
6 cups peeled and sliced fresh peaches
1 tablespoon lemon juice
1/2 cup packed light brown sugar
1/4-1/2 cup granulated sugar (adjust this based on sweetness of peaches)
sprinkle of salt
sprinkle of nutmeg
sprinkle of cinnamon
4 tablespoons all-purpose flour (go up to 5 if peaches are really watery)
1 tablespoon cornstarch


In a large bowl, add peaches, lemon juice, sugars, salt, nutmeg, cinnamon, flour, and cornstarch. Toss together until peaches are well coated. 


Assembly

What you'll need:
1/4 cup butter, in small slices
1 egg, with 1 teaspoon of water beaten
Granulated sugar for garnish


Preheat oven to 350 degrees.

Pour peach filling into pie plate.

Dot top of peach filling with butter.

Roll out remaining dough and add to the top of the peach filling in a full sheet, in a lattice design or in another decorative design of your choosing. I choose to try the lattice design for the first time. I did a search for it on Pinterest. It was so much easier than I thought it would be. 

Brush top of pie crush with egg wash and sprinkle with sugar.

Bake for 35-50 minutes or until crust is golden brown and inside peach filling is bubbling.

I have that you should error on the side of cooking it longer in hopes that it won't be as runny. 


The finished product


I should have let it back and cool a little longer. I was just in a hurry to eat it. 

Do you have any tricks to help fruit pies not be so runny? I really want to learn to make them, so they'll set up nice. 


Sunday, August 17, 2014

Blackberry Pie Bars

These Blackberry Pie Bars are absolutely amazing! Plus they were easy breezy to make. What could be better? If you like blackberries, you're guaranteed to love these. Just look at them!


I found this recipe while searching on Pinterest. My blackberry bushes are exploding with blackberries, so I was specifically looking for blackberry dessert recipes. I found a winner on Tracey's Culinary Adventure. Her blackberry pie bars looked amazing. I just had to try them and I'm so glad I did. You should be glad too. 

Crust
1 1/2 cups flour
3/4 Cup sugar
1/8 teaspoon salt
3/4 cups cold butter, cut into small cubes

Filling
2 large eggs
1 cups sugar
1/2 cup sour cream
1/4 cup + 2 tablespoons flour
pinch of salt
zest of 1/2 lemon (I didn't have a lemon to zest, so I added a few drops of lemon juice)
1/2 teaspoon almond extract (You can use vanilla if you don't like almond)
16 oz fresh blackberries

Preheat the oven to 350 F. Spray an 8x8 inch pan with nonstick cooking spray. (I was tempted to use line the pan with parchment paper, but didn't. It was fine using the spray.)

Add the flour, sugar, and salt in a food processor and pulse a few times to combine. Add the butter and continue pulsing until the pieces of butter are very small and the mixture is crumbly. Put aside 3/4 cup of this mixture. It will be used as the topping. Dump the remainder of the mixture into the pan and press into an even layer to form the crust.

Bake for 12-15 minutes or until golden and brown. Remove pan and place on a wire rack. Cool for 10 minutes. 


It still amazes me that I can use a food processor to cut in the butter. It works so well. 

After the crust is out of the oven and cooling, begin to make the filling. 

Filling:
In a mixing bowl, mix together eggs, sugar, sour cream, flour, salt, lemon zest, and almond extract. Make sure it is well combined. Use a spatula to fold in the blackberries. Spread the filling mixture over the crust. Make sure the blackberries are spread out evenly. Crumble the reserved crust mixture over the blackberry mixture. 


Bake for 40-50 minutes, or until the bars are set. The topping won't really get golden brown, so no worries. When they are done, let the pan cool on a wire rack and cool completely. To make the bars easier to cut, put the pan in the refrigerator for a while.

Here's a picture of these delicious bars again. You know, just in case you forgot how good they look.  


Sunday, August 3, 2014

Chocolate Pudding Cake

It's been a while since I posted something. I have a good reason...I was on vacation in the beautiful Montana. If you haven't been to northwest Montana you're missing out. I go every summer for a family reunion at the lake.


I needed to continue to train for my marathon while in Montana. The first couple of days, it was super smokey outside. This asthma girl can't run in the smoke. I did yoga inside instead. I made welcomed my family to join. I think they had tons of fun, even my little niece tried some poses.


The beginning.

The end.


After the reunion, I chilled at my grandma's house for a few days. I also did some much needed clothes shopping. Montana has no sales tax which makes shopping even better!

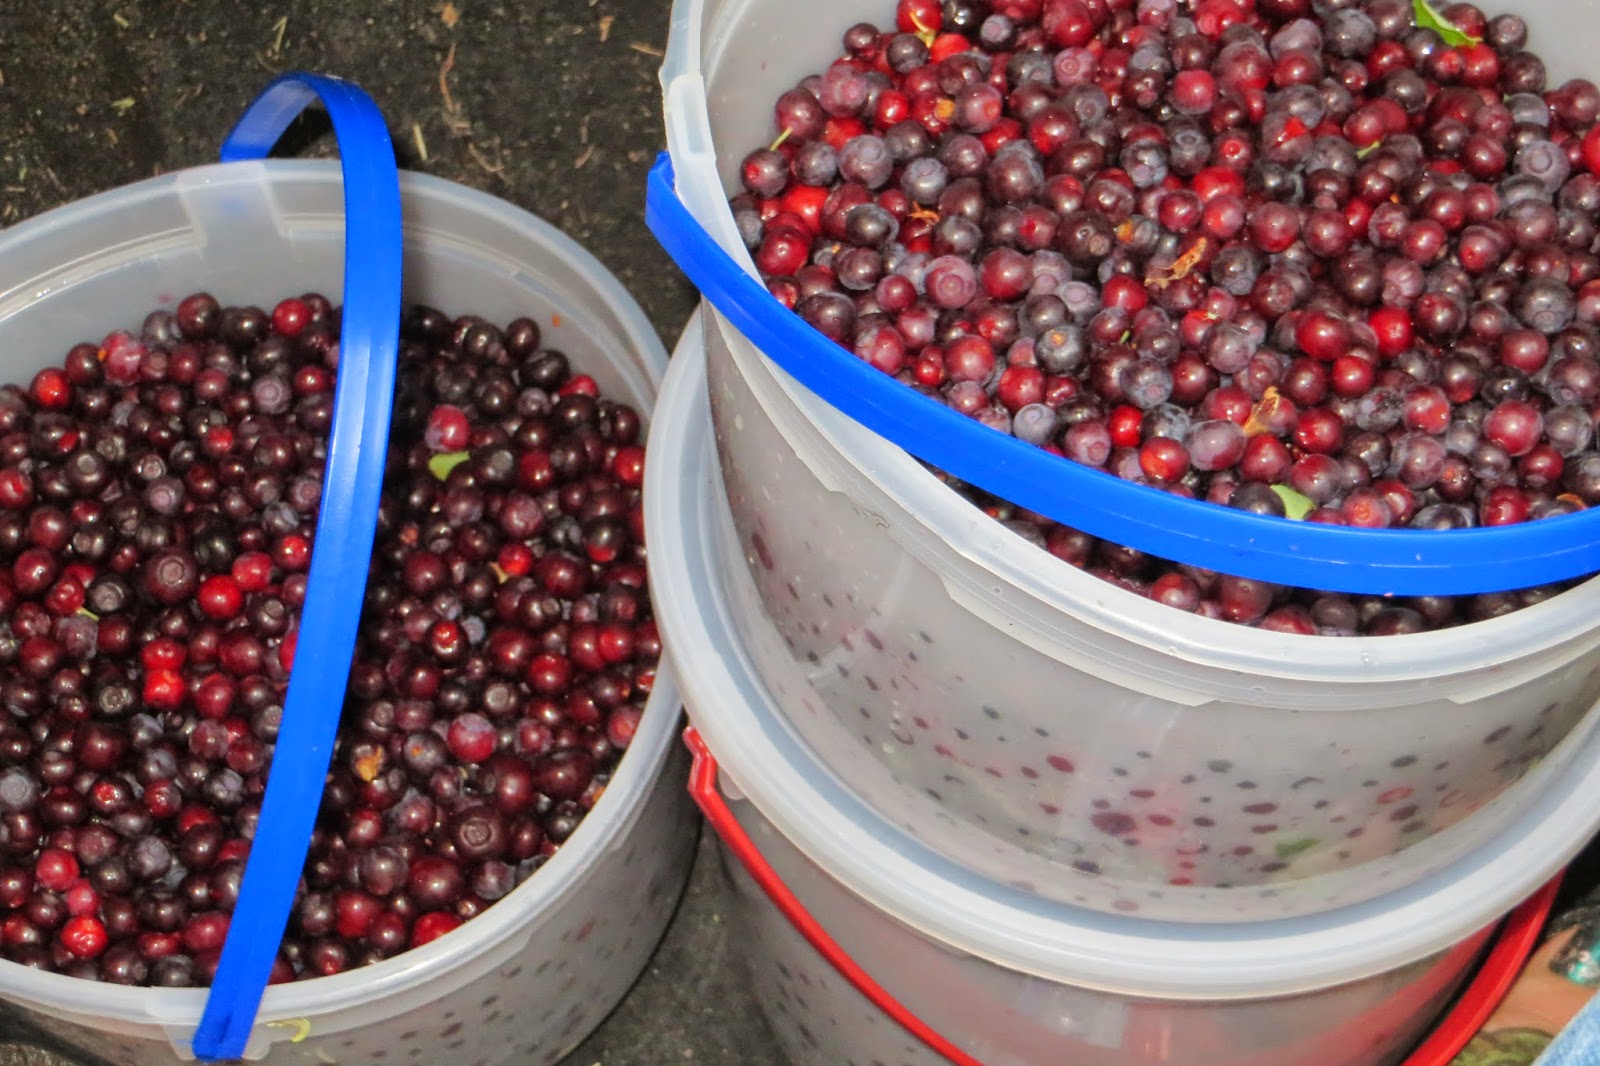
Did I mention that I went Huckleberry picking...twice. Huckleberries are the most delicious berry out there. I am so making a Huckleberry pie soon and other goodies. Don't worry, I'll share, well the recipes at least. :)


 Picking Huckleberries.


It takes a while to clean pick them, but it is so worth it.


My niece is helping pick berries. Her "real" job was to watch for bears. She did a great job and even crawled like a bear to keep them away. Thanks to her hard work, we didn't come across any.


 Look at all these berries!

Now to the   Chocolate Pudding Cake


My mom has been making this since before I can even remember. I believe that my grandma made it for her as a kid. Now I'm sharing this secret family recipe with you. 

Batter:
1 c. flour
3/4 c. sugar
1/2 t. salt
1 t. vanilla
2 t. baking powder
3 T. baking cocoa
3/4 c. milk

Topping:
1/2 c. sugar
1/2 c. brown sugar
3 T. baking cocoa

Preheat oven to 350 degrees.

Mix batter ingredients together and pour into a 9 x 13 baking dish. 

In a separate bowl, mix together the topping ingredients. Sprinkle the topping mixture over the batter. 

Pour 2 cups HOT water over the entire thing. 

Now for the secret. (Recite an appropriate chant, if any are known, otherwise say Better Crocker backwards three times.)

Bake for 30 minutes.
Serves 12

This recipe works great cut in half or doubled. 

Try it out and tell me what you think!


Tuesday, July 15, 2014

Cold Chocolate Heaven

Last night, I went on a  5 mile run up the canyon with a friend. We started just after 8:30. Guess how hot it was? Over 90 degrees! I was drenched in sweat after. I kept thinking to myself that it was good training and sucked it up.

I am in love with Starbucks  frappuccinos. I don't drink coffee, so I always get the blended creme versions. Yesterday, it was so very hot and all I wanted was a double chocolate chocolate chip frappuccino. I broke down and bought one. I couldn't help it. After I was finished indulging in the cold goodness, I thought that there must be an easier and less expensive way to meet my addiction.

I found it! And it was super easy too.

 Doesn't this look amazing? Let me tell you, it was great. I just finished drinking it.


If you would like to make this cold drink from heaven, this is what you need:
1 cup milk
1 tbs sugar
3 tbs chocolate syrup (I used Hershey's)
1/3 cup chocolate chips (I used semi-sweet)
2 cups ice
optional- Redi Whip for the top

Place all ingredients in a blender. Blend until smooth.

I put Redi Whip on top and then drizzled some chocolate syrup.


I can honestly say that it didn't taste the same as Starbucks, but I still thought it was amazing. I know the Starbucks uses special expensive syrup in theirs and I'm just too cheap.

I will definitely make this again and again. By making this drink at home, hopefully I'll be saving some money and some driving time.

You should try this at home then let me know what you think!


Sunday, July 13, 2014

Zucchini Noodles

Last year I purchased a julienne peeler from a Pampered Chef party. I had seen people make zucchini noodles with it and I wanted to try it out. You know, in an effort to eat better. Well, a year has gone by and I finally got around to to trying it. Why did I wait so long?

 I used my julienne peeler and peeled two zucchini down to the seeds. Amazing how the peeler made noodles. I still can't wrap my mind it.

Next, I boiled water and put a dash or two of salt in it.

As the water was boiling, I made the pesto sauce by following the directions on the back of the package.. I really like the Knorr pesto packet. Easy to make and tastes good.

When the pesto sauce was done and the water was boiling, I added the zucchini noodles. Let cook for 30-60 seconds. You'll have to try a noodle or two to make sure they are cooked. If you don't cook them long enough they'll be hard and if you cook them too long, they'll be mushy. I cooked mine just right.

Drain. and mix in sauce.                          
I served my noodles with chicken.

I'm glad I finally made these zucchini noodles. I wouldn't say I loved them over pasta, but I enjoyed eating them. The key is to not compare them to pasta. If you do, you'll be disappointed. I had to think of them as just what they are, delicious zucchini noodles.

Will I make zucchini noodles again? You bet.

How do you prepare your zucchini noodles? Any sauces that you like?

Thursday, July 10, 2014

Motivation

I've been lacking in motivation lately. After Saturday's run, my knee was slightly swollen. I took Monday and Tuesday off from running. I couldn't help myself though and did the 30 Day Shred both days. Don't worry, I wore my knee brace. It is a little know fact about myself that when I take a day or two off running, it is difficult to start again.

Yesterday, I text a friend that I needed motivation to go running. She responded with the best motivation ever. What was it you ask? "You can do it! Running is fun! You don't want to have to buy new clothes this fall!" That was all the motivation that I needed and within 30 minutes I was out the door. (I had to wait for the thunderstorm and rain to stop.)

At mile 4 it began to downpour. It was the best! Running in the rain is the best...when it is hot outside. Do you like running in the rain? 

Here is a list of my favorite motivation tips. They help me get up and going when I need a little extra push.

  • Text a friend for help.
  • Have an accountability partner that you check in with.
  • Have a partner in crime.
  • Set aside your running/workout clothes the nigh before.
  • If you have trouble waking up, put your alarm clock across the room.
  • Schedule your workout.
  • Create a motivation wall that you look at everyday.
  • Search running/workout motivation on Pinterest (not during workout time).
  • Create a mantra that you say over and over to yourself.
  • Take pictures of yourself along your fitness journey. This way you can see how far you've already gone.
  • Set aside a special healthy treat for after your run/workout.
  • Put a $1 in a jar each time you run/workout. Use the $ to buy new clothes when you reach your goal.
  • Create a reward system. List reward items and what you need to earn them.
  • Remembering how good it feels. 

What motivates you to run/workout when you really don't want to?  

JUST REMEMBER, DON'T GIVE UP.


Sunday, July 6, 2014

Best Chocolate Chip Cookies Ever

You ever had one of those mornings where you wake up early to run and you know your run is going to suck before you even begin? That was me yesterday.  I kept thinking the whole time "I can do hard things"and "I want a cookie". It was the most difficult 10 miles of my life. Good news though, I made it. I headed to the cookies as soon as I walked through the door. 

Eating a few cookies literally saved my life, so I thought I'd share them with you. Wait...I ate them all. I guess I can give you my recipe and you can make them yourself. You won't be sorry. These chocolate chip cookies are the best ever. They are the perfect level of chewiness. 

Don't worry. I didn't eat all the cookies on the plate.

Blend together the butter, vanilla, vanilla pudding mix, baking soda, and eggs.

 Add in the brown sugar, white sugar, flour. 
When the dough is mixed well, add the chocolate chips.

 Spray cookie sheet with non-stick spray.
Roll the dough into about 1 inch balls.

Cook at 350 degrees for 10-12 minutes. 
You'll want to take out the cookies when they are just starting to turn light brown.

 Leave cookies on the cookie sheet for about 3 minutes.
 This will finish baking the cookies and leave them perfect.

Place cookies on a wire rack until cool. Then enjoy!


Best Chocolate Chip Cookies:
2 sticks butter, softened
1 large package vanilla pudding mix
2 eggs
1/2 tsp baking soda
1 tsp vanilla
3/4 c. brown sugar
1/2 c. white sugar
2 1/2 c flour
1 bag chocolate chips

Preheat over to 350 degrees.

Blend together butter, pudding mix, eggs, baking soda, and vanilla.

Add brown sugar, white sugar, and flour. When dough has formed, add chocolate chips. 

Spray cookie sheet with non-stick spray. Roll dough into 1 inch balls. 

Bake for 10-12 minutes. Take out when the cookies are starting to turn light brown. Let cook on pan for about 3 minutes before moving to cooling rack. 

Makes about 4-5 dozen.

This dough can be frozen: Roll into balls and place in freezer bag. When you are ready to bake them, take out of freezer and let thaw a little before baking. 


Friday, July 4, 2014

4th of July and Pea Salad

Happy 4th of July!

I am so thankful that I live in America and for the many freedoms that I have. I also love getting together with family, friends, and neighbors to eat great food and watch fireworks. My neighborhood has had a HUGE block party the last several years. It's happening again today. People bring meat to BBQ and a dish to share. I have brought a dessert the last couple of years and I wanted to do something different this year. I decided on pea salad.

Pea Salad: Doesn't this look delicious? And it's super easy to make.


I hope this will be enough.


Dice the cheese.


Chop the red onion. I used my Pampered Chef chopper. I love this thing.


Thaw the frozen peas. I placed the frozen peas in a bowl and ran hot water over them. Drained and repeat. It took two or three times to thaw out the peas. Make sure you drain all the water off.


Mix together Miracle Whip or mayonnaise, sour cream, salt, pepper, and paprika.


Cook bacon until it is crisp. Paper towel off the grease. Crumble.


Add cheese, red onions, bacon, and dressing mixture to the peas. Stir well. Keep in the refrigerator until you are ready to serve.


Pea Salad:
2 16 oz frozen peas, thawed and drained
5 strips bacon, cooked and crumbled
1/2 - 1 cup Cheddar cheese, diced
1/2 - 1 cup Mozzarella cheese
1/2 of a red onion, chopped
1 cup Miracle Whip or mayonnaise (I used Miracle Whip because I like the tangy taste)
2 tbs sour cream
salt and pepper to taste
paprika to taste

In a large bowl, mix together all ingredients. Make sure to mix well. Refrigerate until ready to serve.  

Tuesday, July 1, 2014

Jillian Michaels 30 Day Shred

Ouch! It kind of hurts to move.

I purchased Jillian Michaels 30 Day Shred a couple of weeks ago. I read a bunch of online reviews before I bought it just to see if it worked for the general public. What I read seemed favorable, so I found it on Amazon. I think that you can also get on YouTube of the BeFit channel.  I didn't want to start it before my half marathon or the week after when I was still sore.

Yesterday was the day! I ran four miles in the afternoon on the deathmill. When I made it home, I still craved more. In the DVD player it went. I set it on level 1. Holy crap! I sweated bullets.

For those of you who have never heard of the 30 Day Shred, here is a little about how it works. The program has 3 levels. You complete each for 10 days. I read somewhere that Jillian Michaels said she never intended for people to do all 30 days in a row. She encouraged people to take a day off every few days. The 30 Day Shred program is a circuit training. You complete 3 minutes of strength training, 2 minutes of cardio, and 1 minute of abs. Each level repeats this series several times. The is also a quick warm-up and cool down. You get all this in about 23 minutes.

I got up just after 6 am to repeat the torture because it felt so good. I've had to make a few changes. First, I had to hold onto hand weights when I did push-ups, because my wrist is still tender from last months surgery. It worked great. Second, I had to take a short break during the jump rope section because my calves were cramping up. Third, I made sure to follow Anita, the nice lady doing the adapted exercises.

Have you tried Jillian Michaels 30 Day Shred? Did you get good results? Have you completed it while training for a race?

I'm hoping to see good results and to get stronger. Your input is greatly appreciated. Thanks!

Sept. 2014 update:
I was trying to complete the 30 Day Shred and train for a marathon. Not really the best idea. For the three weeks I did the program, I felt stronger and I did lose a few pounds. I had to make the difficult decision to stop in order to consentrate on running. I WILL start again after my marathon at the end of September.

Sunday, June 29, 2014

My Version of Cafe Rio.

This weekend I went camping with some of my brothers and their family. No one in the group really planned anything. My big concern was "what are we going to eat?" I ended up making food for the group. Spaghetti is pretty easy to make while camping, so that's what I decided on. I also brought a can of corn. When the spaghetti was cooked, I didn't want to dirty a pan to warm the corn. My sister-in-law suggested we just add the corn to the spaghetti. It was surprisingly tasty. My little niece ended up eating more than anyone.

Do you know what is better than spaghetti with corn? Copycat Cafe Rio!

I LOVE Cafe Rio. I have several Cafe Rio copycat recipes that I make, but I've never made them all together until today. Look at good the salad it turned out. Can you smell it? YUM!


Cafe Rio copycat salad

Here are the recipes and some of the steps that I followed.


Sweet Pork: I know, there are lots of copy cat Cafe Rio pork recipes out there. They all call for lots of ingredients. Not this one from my cousin. It's super, super simple. Ready?
1 pork roast
2 cups brown sugar
1 cup salsa
Put all ingredients in a crock pot and cook on low for 6-7 hours. 
Shred and mix together.
That's it!


Cilantro Ranch Dressing: (from http://therecipecritic.com/2012/07/cafe-rio-copycat-cilantro-ranch-dressing/
1 packet traditional Hidden Valley Ranch mix (not buttermilk)
1 cup mayonnaise
1 cup buttermilk
2 tomatillos, remove husk
1/2 bunch fresh cilantro
1 clove garlic
juice of 1 lime
1 jalapeno (I don't like hot things, so I removed the seeds)
Put all the ingredients in a blender and blend. 


Cilantro Lime Rice: ( adapted from http://therecipecritic.com/2012/08/cafe-rio-copycat-cilantro-lime-rice/ )
1 cup uncooked rice (I used long-grain white rice)
1 tsp. butter
2 cloves garlic, minced
1 tsp. freshly squeezed lime juice
2 tsp. chicken bouillon granules
3 cups water
1 tbs. freshly squeezed lime juice
2 tsp. sugar
3 tbs. fresh cilantro, chopped

In a saucepan, combine rice, butter, garlic, 1 tsp lime juice, chicken bouillon, and water. Bring to a boil. Cover and turn to low for 15-20 minutes or until rice is tender. As rice is cooking, mix together 1 tbs lime juice, sugar, and cilantro. When rice is done, remove from heat and mix in cilantro mixture.  


Finishing Touches: The way I build the salad

Tortilla- I like to buy uncooked tortillas. For some reason I think they taste better. Today, when the tortilla was cooking on its last side, I sprinkled on shredded cheddar cheese and let it melt. 

Lettuce- I like using romaine lettuce. Wash and cut into bite size pieces. Add to tortilla.

Add cilantro rice.

Black beans- I open a can of black beans and rinsed them with water. I warmed them up in the microwave, since I don't like cold beans.

Load with sweet pork.

Top with cilantro ranch dressing. 

There you have it! Try it out.

I can't wait to make myself a burrito, nachos, and quesadilla. Hopefully not all on the same day.

Are there other ingredients that you like to put on your salad? I would love to hear from you.